How to run a Linux app in Windows using WSL and USB device passthru
*** READ EVERYTHING BEFORE YOU BEGIN SO YOU UNDERSTAND WHAT'S HAPPENING ***
There is a more straightforward method by installing Ubuntu to a VM using VirtualBox, but I'm not making a tutorial for how to install linux - I just let WSL do all that for me because it's clean & tidy, fast and compact.
This tutorial has been adapted for running Legacy-iOS-Kit but can be modified for any Linux app or USB device. It can be used to do an iOS jailbreak or anything that comes after that process. Maybe you'll help send humans to mars with this tutorial - who knows. There is a split path partway through where you will choose one of two methods. Just follow the instructions and read everything. If you screw it up you'll just be doing the same thing twice two different ways.
If you need to be told to press enter after a command, you may struggle quite a bit with the rest. If that's the case, godspeed.
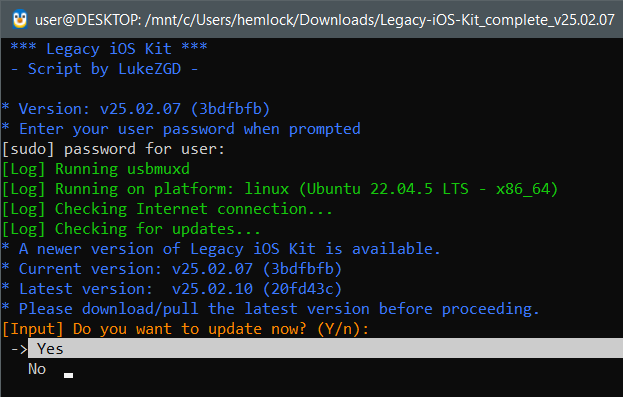
Download and extract your linux app to a folder. I'm extracting mine to Downloads for simplicity.
Example: (Legacy-iOS-Kit_linux_x86_64_v25.02.10.zip)
Example: (Legacy-iOS-Kit_linux_x86_64_v25.02.10.zip)

If it's running, stop the Apple Mobile Device Service in Task Manager
(Ctrl-Shift-Esc --> Services tab)
This MUST BE STOPPED or it will block the device from being attached!
(Ctrl-Shift-Esc --> Services tab)
This MUST BE STOPPED or it will block the device from being attached!
Install WSL
(Literally just running wsl --install from an elevated powershell then we're done, ignore the rest.)
Install usbipd and reboot after
(usbipd-win_4.4.0.msi)
Run WSL and let it install Ubuntu --> Start, Apps, Ubuntu
(It MUST be running to passthru a USB device to it!!!)
I will be referring to the Ubuntu app as WSL, they are one and the same in our case. Ubuntu shows up in Apps, WSL shows up in Programs.
(It MUST be running to passthru a USB device to it!!!)
I will be referring to the Ubuntu app as WSL, they are one and the same in our case. Ubuntu shows up in Apps, WSL shows up in Programs.
You now have two different choices to pass the USB device to WSL. Manually with Powershell, or with a nice graphical app where you can just point and click. Pick one or the other, whichever you're comfortable with.
BE WARNED: If you use the GUI instead of powershell there is a small chance it'll rename the iphone device to "USBIP Shared Device". Windows would not see my iphone again until I unbound the device in the app, went into Devices and Printers in Windows Control Panel, uninstalled "USBIP Shared Device" and unplugged/replugged the iphone. I'm not sure how it happens, it's possible this was because I was flipping between the GUI app and powershell to make this tutorial.
BE WARNED: If you use the GUI instead of powershell there is a small chance it'll rename the iphone device to "USBIP Shared Device". Windows would not see my iphone again until I unbound the device in the app, went into Devices and Printers in Windows Control Panel, uninstalled "USBIP Shared Device" and unplugged/replugged the iphone. I'm not sure how it happens, it's possible this was because I was flipping between the GUI app and powershell to make this tutorial.
WSL USB Manager Method (The easy way)
Download and install WSL USB Manager
(WSL-USB-5.5.0.msi)
Connect USB device and run WSL USB Manager
Install dependencies if asked
Connect USB device and run WSL USB Manager
Install dependencies if asked
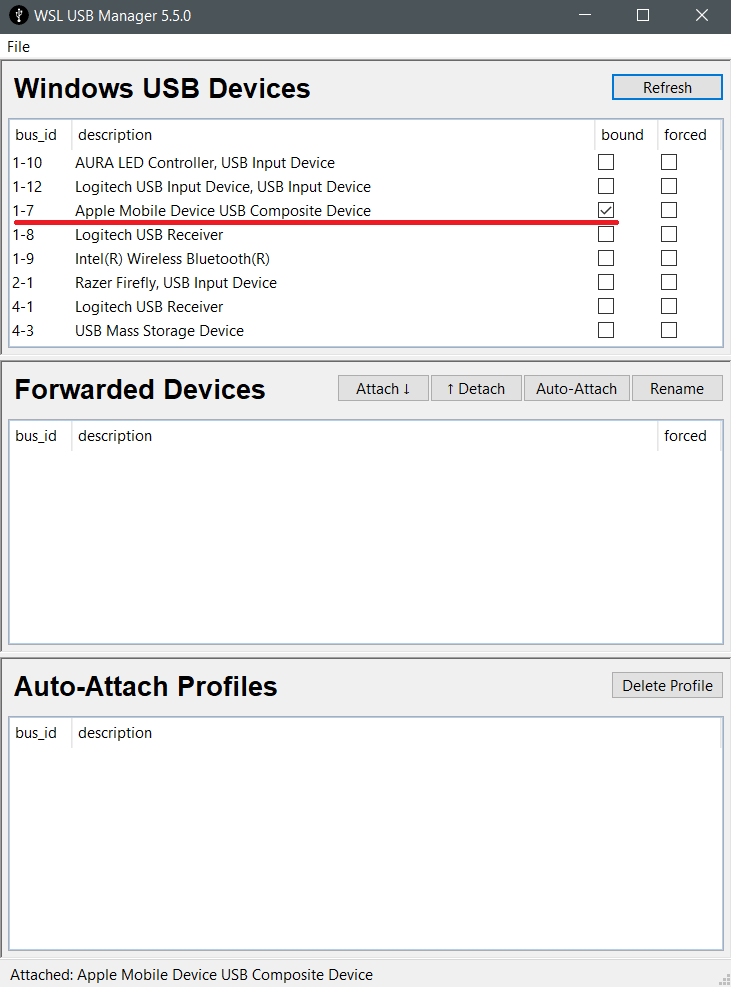
Click bound for the desired device
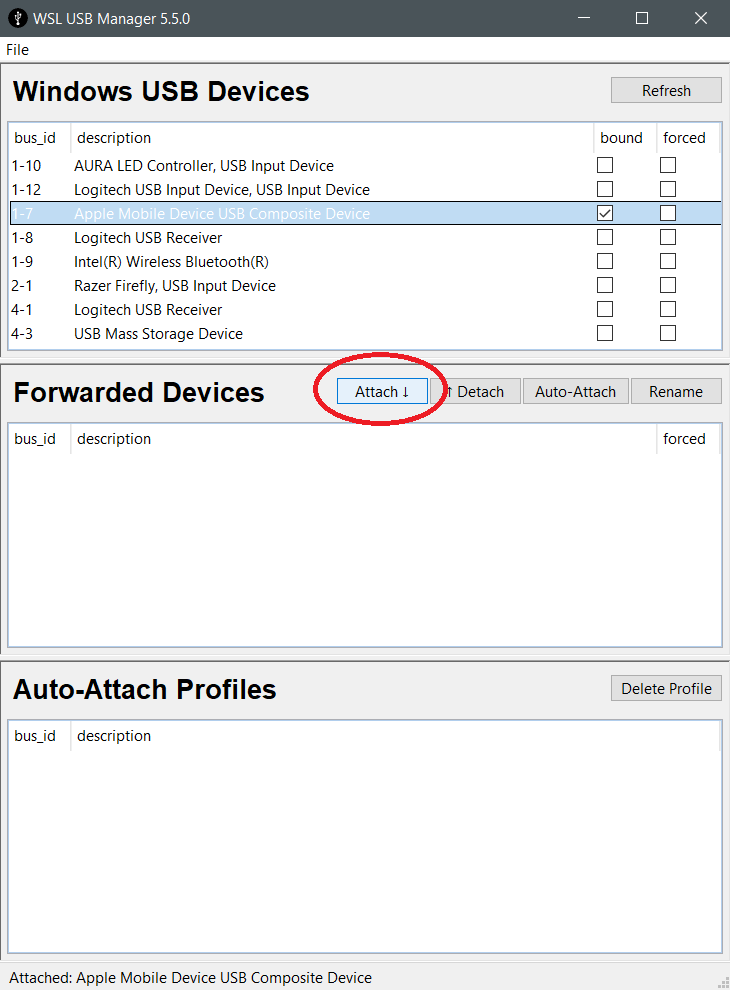
Click on the item then click attach. You may have to hit refresh
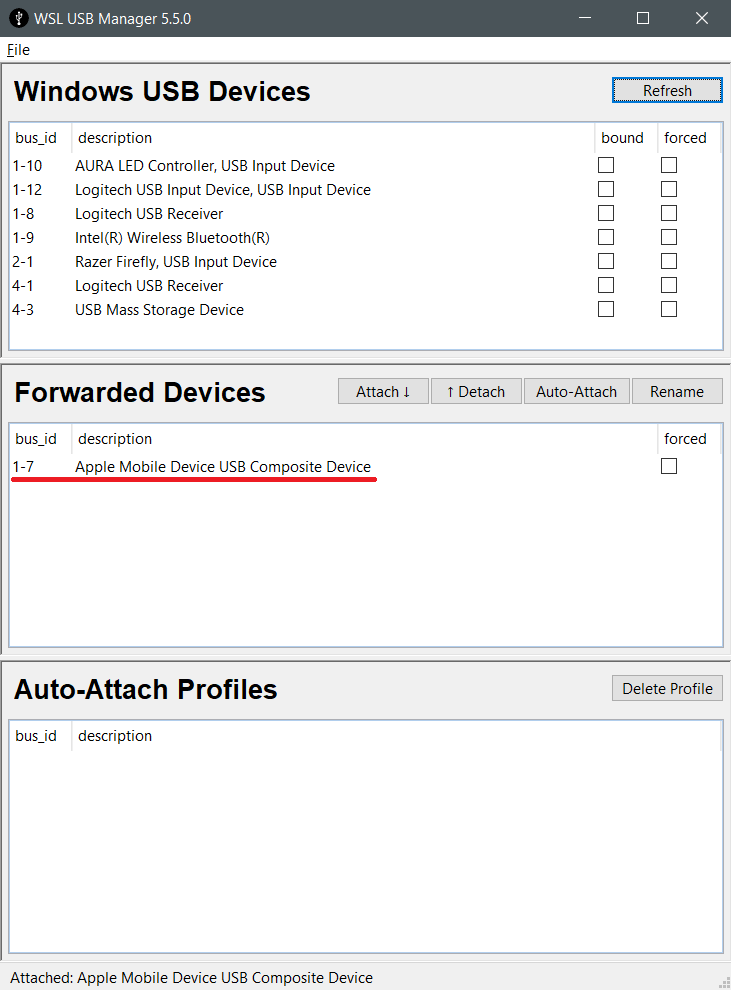
Device is now attached
Click File then Exit or else it minimizes
Click File then Exit or else it minimizes
Manual Powershell Method (The hard way)
In Windows start menu find Powershell, right click and run as administrator. We're going to share (bind) the USB device then pass it through (attach/forward) to WSL so it can be used. All this is documented HERE, but here's the quick steps:
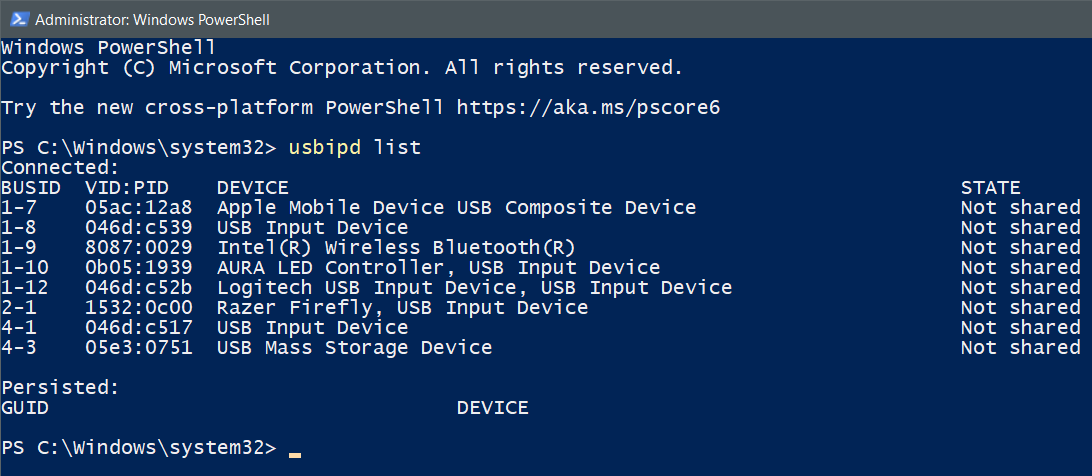
Type: usbipd list

My device is device 1-7 so I bind that:
usbipd bind --busid 1-7
You should get no output, that means it ran without error.
Attach (forward/passthru) that device to WSL:
usbipd attach --wsl --busid 1-7
usbipd bind --busid 1-7
You should get no output, that means it ran without error.
Attach (forward/passthru) that device to WSL:
usbipd attach --wsl --busid 1-7
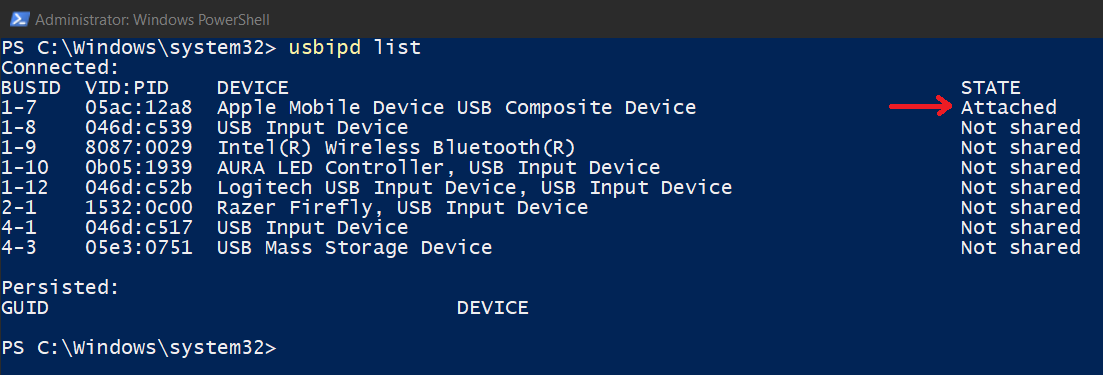
You can check that we're attached by running: usbipd list
If it says shared, the device is bound but it's not attached yet.
If it says shared, the device is bound but it's not attached yet.

Back in the WSL window type: lsusb
We should now see the device being passed through
We should now see the device being passed through
Now change to the directory of your linux app. It will be easiest to copy and paste my example into notepad, modify with your username and app folder name, then copy it and right click in the WSL window to paste. Example:
cd "/mnt/c/Users/hemlock/Downloads/Legacy-iOS-Kit_complete_v25.02.07"
cd "/mnt/c/Users/hemlock/Downloads/Legacy-iOS-Kit_complete_v25.02.07"
(quotes are 100% needed if there's any spaces! It's OK to keep them in even if there's no spaces)

You can then list the directory to see what's there:
Type: ls
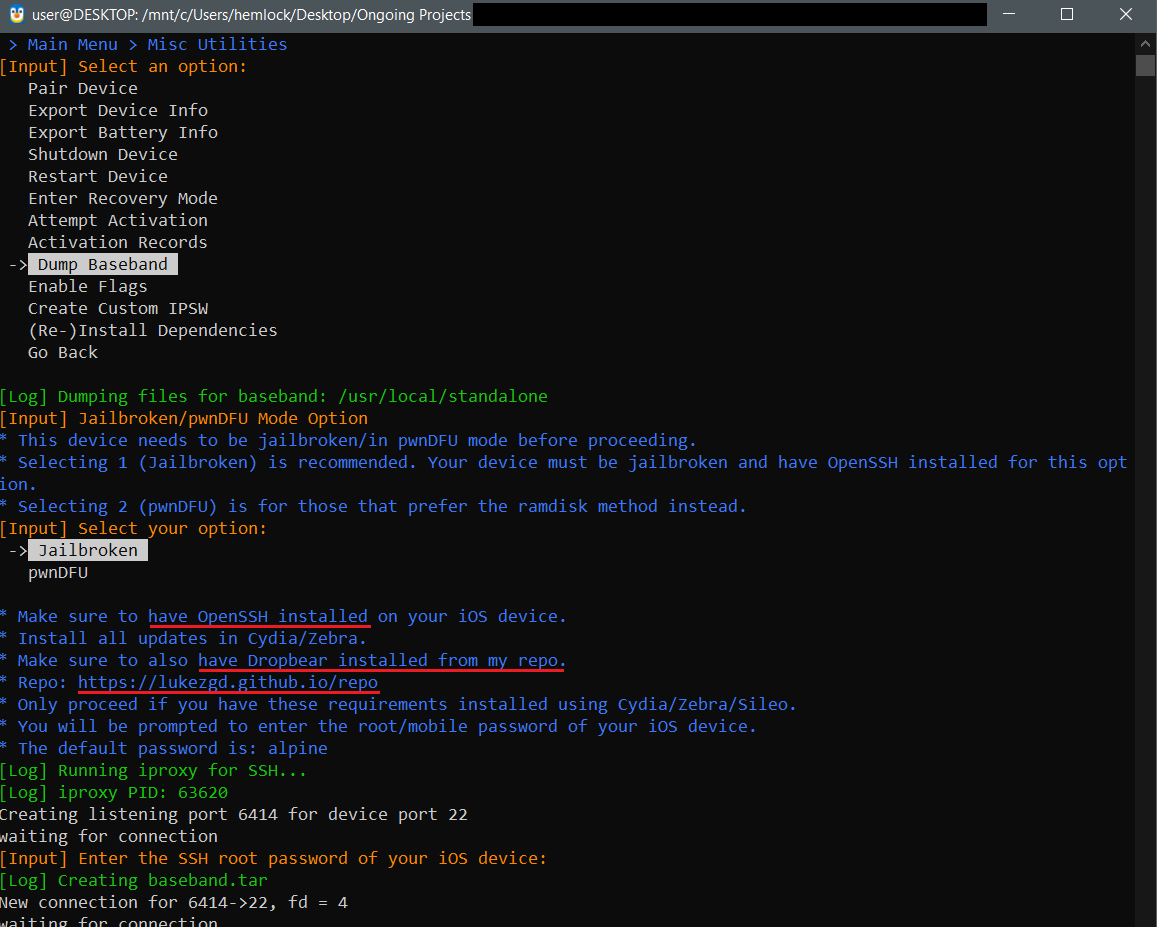
Now run your linux app or script:
./restore.sh
Type: ls
Now run your linux app or script:
./restore.sh
When you're all done running your linux app, you'll have to go back into Task Manager, Services and start the Apple Mobile Device Service or Windows won't see the iphone like normal
We didn't need these, but here's the commands to detach and unbind the device with powershell in case you need them:
usbipd detach --busid 1-7
usbipd unbind --busid 1-7
usbipd detach --busid 1-7
usbipd unbind --busid 1-7